Showing posts with label hings to buy. Show all posts

Tuesday, 5 August 2014

Nail Art Pen Fail?

The nail art pen is one of those tools you have in your arsenal of creative clobber,  you see it demoed,  you hear other people rave about it, you buy it...and then.....

It lands on your door step...and doesn't work! 

"ARGHHHHHHHH" you shout  "there is yet another nail art gadget that promises the world and delivers very little"

Hold your horses.....don't despair my friend. I have come to the rescue. 

I often get questions about the pen, and generally it is a very simple solve.  You have to remember my philosophy is that life is too short to make it hard!  Everything I develop, innovate or design is done so that it should be an advantage to your work.  It should not  require effort or additional time….
what that means is that I am a lazy tech, and just want to do art.

The nail art pen is a brilliant addition to your kit and with one dip you can go on and on for ages drawing thin or thick lines. You will save you time, money and BONUS; effort! 


So lets cover the basics, and see if we can get this pen working for you. 

1. Are you using our paint? 

You can use ANY paint with the nail art pen, but the paint has to be thin enough to travel through the small grove in the nib. Too thick and it will not move or flow. Our paint has a very high pigment content and the pigment is fine enough to be used with the nib. If your trying to use a lessor quality paint and water it down you will get a washed out look. The paints from Be Creative are only £2.50, and have been included into our range only to support the nail art pen. You can find them here.

2. Is your paint thin enough

 The paint needs to be watered down to the consistency of single cream (half and half for my USA friends) or a full fat milk. …..see example on my instructional film on the website here . If your paint is not watered down enough you will not find it easy to use the pen. If you have bought a new paint from us, and it is not full, add water to fill it, shake the bottle and this will be the correct consistency. REMEMBER water evaporates....not colour. So leave your pot open and the paint will thicken. - just add more water. 

3. Good tip to start the flow

Dip nib into water first and then into the paint…this helps with lubrication (not always necessary). When you have finished with the nib, wash it well, remove the paint and then dip it in washing up liquid (American translation; dish soap) and leave. When you use it again you will have that nib nicely lubed. 

4. Paper first! 

Always start on paper first, not to mention practise, when you have a client in front of you, dip and then draw a couple of line on some paper.... ON A FLAT HARD SURFACE common sense I know, but you would be surprised how many people try and add pressure over the top of 3 layers of fluffy towels and desk towels.  See film on website….to achieve flow move the pen nib back and forth on the paper to get it going.  

5. Squeeze the handle of the pen. 

To be honest this is more a tip, and not a must to get the pen working, what it does is  generates tension in the nib…and helps with the flow without applying too much down pressure. Remember more pressing down equates to thicker lines. 

6. Are you painting on a rough surface?    

If the nail is shiny, say you have added top coat or gel top coat,  the pen and paint will slip. Lightly buff the surface, or do what I do; apply 2 coats of gel polish colour, as  normal, then wipe the tacky layer off once cured with a dry lint free wipe. Use the nail art pen and then top coat. 

7. Is it deep enough 

This is the most common issue people have, are you dipping in the paint far enough with your nib, people still use the nail art pen like a brush or a dotting tool, but this is incorrect. You need to dip the nib all the way up, this will fill the reservoir and give you loads of application time without re dipping.  - see film on website

8. It is not a brush

 ....and never will be, most people use it the same way as a brush, WRONG
it is a pen.....and should be used this way. 

There is another issue as well, the nib fit. check out this previous blog post on how to get it right, but make sure the oval hole in the nib is not covered. 

I hope you have found this useful, and good luck with your pen. 

Saturday, 26 July 2014

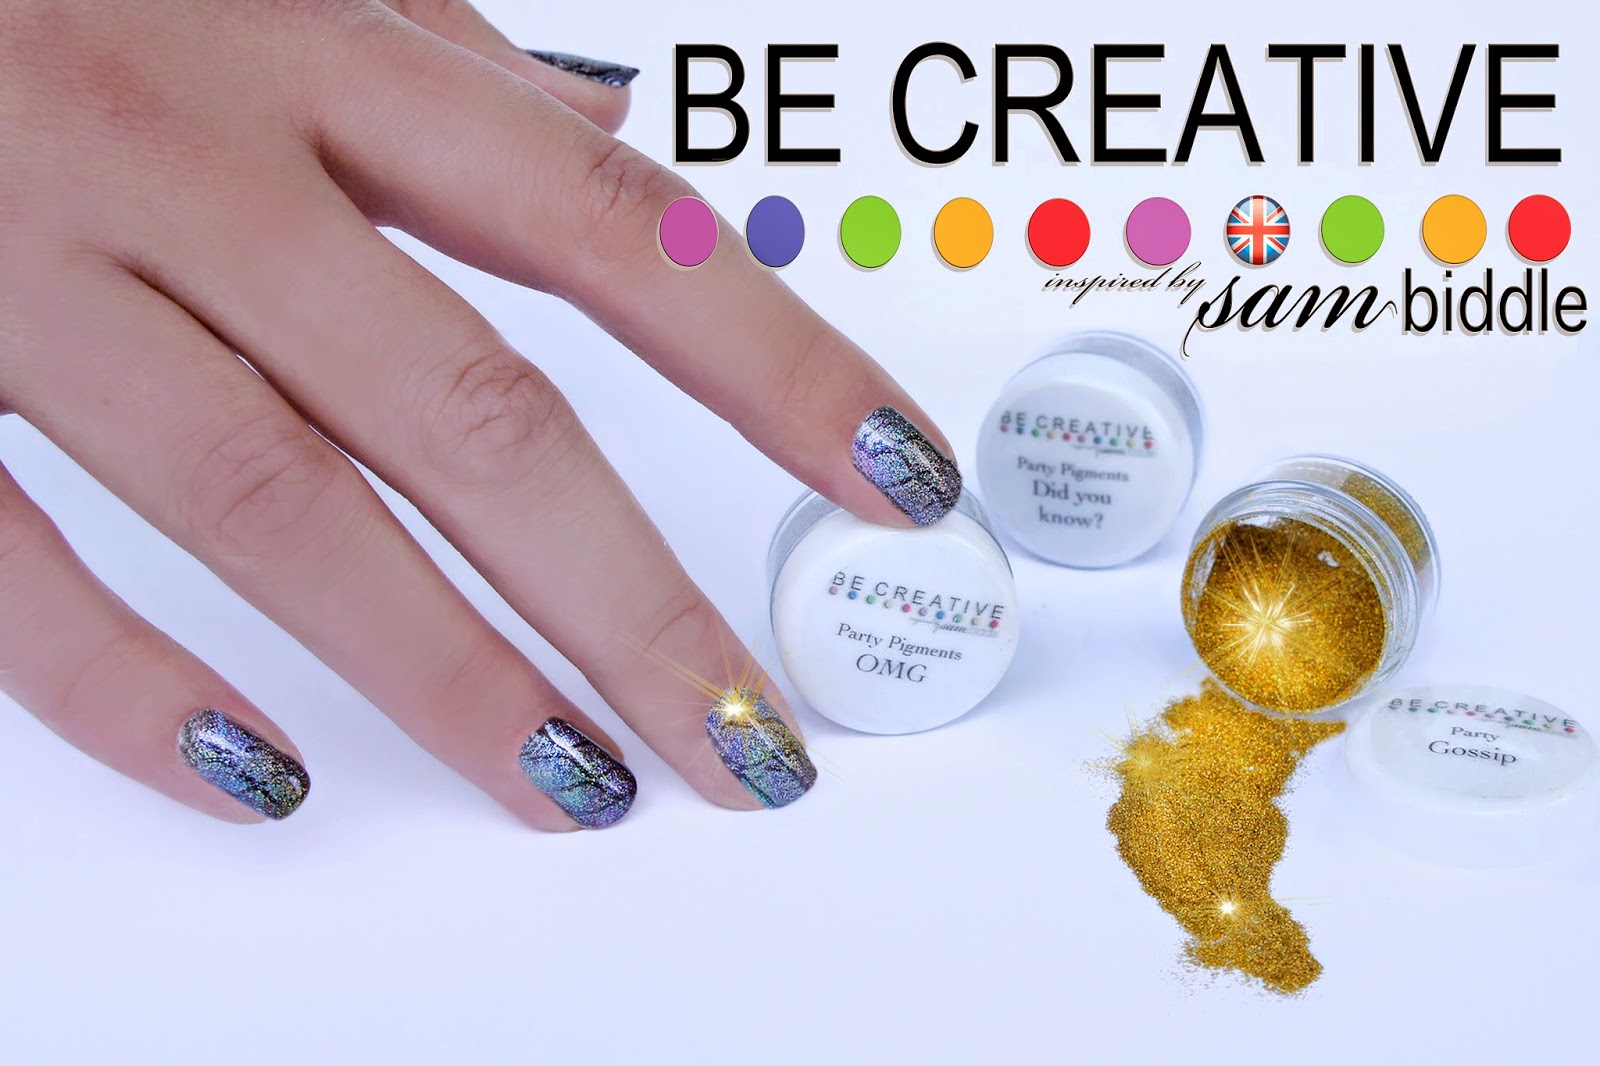
Guess what! Did you know? OMG…….. Gossip!

These are not just what we think of the NEW Be Creative Pigment collection, these are the names which sum up these mesmerising pigments perfectly. 


These pigments literally move with the light. Tiny particles of pigments which reflect the light, gives us the thinest possible glitter effect. Applied like you would pigments, this sits beautiful within your design nails, on  top of gel polish or in nail art to lift it. With no bulk! 


This collection will turn heads, stop you in your tracks and be just plain distracting. Worn over a dark colour or paler shades, the looks are endless and possibilities, limitless. 

The most frustrating thing about this pigment collection is that you have to see it to believe it. I cannot take a photo which will do this pigment justice…the nails literally move under the sun light. We brought this unique collection to you now, because we wanted to take advantage of the mesmerising effects they have on fingers and toes.  


USE WITH GEL POLISH & POLISH
Sparkle has a whole new meaning with the party pigments, they are thin, and ‘affect’ the nail colours beneath it; bringing it to life. These nails are set to rock your world and combine them with your favourite polish you can breath new life into tired nails. either tap or sprinkle the glitter of the nails randomly so they stick to the wet polish or inhibition layer of your gel polish, use a dry brush to lightly press it for a more dense coverage and bigger impact. of add small amounts with a smaller size 0 detail brush. 
This glitter pigment collection is fine enough to be able to scratch into the coverage and show off the colour under neath. creating another quick design option suitable for the salon and your clients.

USE WITH OTHER PIGMENTS
Don’t stop there, brighten up the ‘brights’ and add a little extra sparkle to your chameleons with this collection. Either mix together the two powders or apply directly to the nail. 

USE WITH NAIL ART
Have you wanted to add glitter to nail art, but had to layer on the top coat to achieve a smooth surface and then you end up loosing all your hard work and fine detail in the design. The glitter in this collection will let you jazz up, and make you nail art shout out…without adding bulk. 


The inspiration behind the collection!

Gossip 
This is a holographic gold glitter, finer than sand, this is the only glitter which you can apply and it will sit flat. used with ‘Guess what’ or ‘OMG’ you can custom make your look so it is different every time. no pre mixing, just pick up a try brush and gently tap the glitter so it falls into the wet inhibition layer. 

OMG
seriously silver this glitter will have you saying ‘Oh My Gawd!' every time you look at it. My favourite this is another holographic glitter that is so fine it will add not thickness to your nail application. 

Guess What!
A secret weapon, this is a green gold glitter pigment. applied over a dark colour it will give you a green shade with a fine gold accent. but when you use it over a nude, white or paler colours you will benefit form a subtle gold glitter. 

Gasp! 
This is a blue pigment, similar to the chameleon, when applied over a darker shade you benefit from an intense blue which is enhanced by the blue glitter particles, so fine they add little bull to your nail application. 

XOXO
because you will love using this Lilac pigment, applied over a dark colour you will get a more intense pink, but this is the most beautiful glitter pigment over a white or light colour. the glitter in it simply dances of your finger tips like tiny fairies. 

Did you know? 
We have been asked for black, and now we have it, with a little extra. a fine semi opaque pigment this black is laces with a fine sliver of silver. as the black pigment sits over a dark colour you will find it adds a different dimension to the colour, but the application of this pigments over the primary is so easy. the finer particles means you can work it over the lightest colour and it will create a perfect Ombre. 


right now this is a collection thats hot! get yours today here. 

Friday, 18 July 2014

K.I.S.S the nail.....


We see these wonderful creations on Facebook, Instagram and Pinterest  and think yeah I can do those, or we might look at them and weep at the complicated design and think I could never achieve that. We are artists, designers and creators of all things beautiful, and of course we are professional self doubters.

The question is not I can't do this, it should be, 'how can I create a nail design for my client which is one step ahead of my competition and does take any more of my time. How can I make money providing nail art?' 


There are three simple steps to making designs work for you, to help you turn a profit and stop the ever growing head ache of finding new and inspirational looks to stay ahead of the game. 


1. K.I.S.S - Keep it Simple Sexy. Seriously too many times we over complicate the process or design because we think it is not enough or too easy. Step back, look at the clock...tic tic tic toc every second is costing you money. So simple dots, and swipe of the nail art pen and viola your client will stare at you in wonder, and post her nailagram pics instantly with pride. The complicated stuff can happen in your own time, when your relaxed and confident you have earn your pennies. 

2. DUPLICATE - did you know the same design can be done 10 times over and look completely different every time. Use three shades of the same colour on your design, now do it again with 3 shades of a different colour; pinks, blues, greens, greys....(wink wink). Now line them all up in a row, pop a little ticket saying with the price, and your customer just needs to choose the colour she prefers.

3. NEVER APOLOGISE FOR THE PRICE - so we have a design, which might actually take us about 10 extra minutes on our service, (if you used the be creative pigments, you could slash this service time by a third...just saying), Now your thinking half way through the treatment, I need to charge her an extra £5.00 or £10 for 10 mins work.......! Your training, the time it has taken to come up with the design and the exclusivity of you and you alone being able to offer it is what they are paying for, yes you could pop a few gems on and create a fade with pigments in your sleep, but she is happy enough to pay for that little bit extra. Wouldn't you?????? 


There is one other thing you can do to, arm your self with a fist full of deigns, quick, simple and very effective, these will wow your clients and have them comping back for more. 
Are you in Dorset? This Monday we have a class for all your Dorset techs.....inspired designs which will turn you a tidy profit, a day guaranteed to help you and your business grow. 
 Visit this link to book and find out more information.  - 

Friday, 27 June 2014

Festival Nails - a step by step

Bright, quick and perfect for the summer. Glastonbury is this weekend why not try this look, they should fit right in.  I just love these steps, using gel polish, black paint and the nail art pen, you can get this look with ease. 


  1. Apply your base colour, this can be a pale pink, white or nude. 
  2. Now pick three bright festival colours and cover nails randomly. Don’t worry if these colours merge and blend into each other, this will give a nice effect and just allow the design to flow in different directions. 
  3. Cure then add white lines between some of the colours this will make the colour pop out, using a long striper is fine…as we are not looking for neatness here. 
  4. Finally top coat the design, wipe and the lightly buff the surface. This is where the fun begins. 
  5. Using the nail art pen dip this into Be Creative black acrylic paint, now draw swirls across the nail, we are looking for a reversed effect, you will then colour in the out side sections leaving the bright carnival colours underneath, this will look like a layer effect. 
  6. When your done simply top coat once again. 
Send us your images we would love to see what colour combinations you come up,and the patterns. visit the be creative Facebook page at 

Friday, 20 June 2014

So much fun!

Recently we launched a new collection of Bright Pigments, and I have literally been addicted! Using them on everyone. It did occur to me, I have yet to post any useful step by steps, so I thought I will give you some Bright Inspiration right now.


I have created these stripes by adding a small amount of sticky tape over the gel polish, and then patted the pigment as a blend, peeling the tape away is sheer bliss when the pattern is revealed. I was nervous, reapplying the tape over these fresh pigment lines but they did not move…yay! 

As you can see in these steps I have gone over them a few times. Then top coat when your happy. If you want to create the effect I have..use the nail art pen and acrylic paint over the lightly buffed top coat and then simply top coat again. Try this look with the Cut grass, Ocean and sunshine pigment....I have used various combination of this collection aver all the nails. 

I have used a tape which has more give and stretch, it seems to sit better in the creases of the side wall, but if you don't have that, I have had success with cello tape. My suggestion is to triple cure the gel polish to reduce the amount inhibition layer (sticky) 

Wednesday, 11 December 2013

Oh Christmas tree....Oh Christmas Tree

Oh Christmas Trees….Oh Christmas Trees…..they are seriously a staple for nail art this time of year, but we need to jazz it up a little, don’t you agree? 

  1. Gel polish (or use regular polish if you prefer) your clients nails….any colour. 
  2. Apply a glitter topcoat in the shape of a christmas tree (that would be a triangle)! 
  3. Using the nail art pen, as a dotting tool, apply silver dots randomly over the glitter triangle. 
  4. Repeat this using white and gold. 
  5. Using the nail art pen, and any colour you like (for me it is gold) draw on your tinsel, like gold rings, getting bigger as they come down the tree. don’t forget to top off your tree with a star…or a Swarovski crystal if your feeling generous. 


check out the nail art pen, for more unique design ideas. 

Tuesday, 10 December 2013

Xmas Nail Art

 Fast and furious…that is what this festive season is like in salons all over the country. 
This step by step is your perfect solution, to give your clients something totally unique this Christmas.


  1. Gel polish your clients nails, in the colour of her choice. Top coat and wipe off inhibition layer.
  2. Buff the nails, so you remove all the shine….reassuring your client that she will end up with beautiful nails in the end. 
  3. With your top coat (must have an inhibition layer) apply creating circles randomly over the nail. Just 2 - 3 per nails. don’t over do it and Cure.
  4. Using Be Creatives Chameleon pigment (the blue looks amazing also) I have used lilac lounge lizard in this step……pat into the sticky layer of the top coat. 
  5. The nail  art pen is an amazing tool for nail art, but it is also fabulous for scratching through your pigment, remove the pigment in various patterns over the baubles.
  6. Now use your nail art pen to create a thin line of gold (or white) to hang your these baubles from your tree. 
  7. Last step - top coat to seal. 
check out the chameleon pigment for some more great special Fx on nails. 

Friday, 29 November 2013

We have a Winner!

What a competition - the nail art pen has rocked the industry over the last 12 months, hitting four continents and changing the way nail professional work in the salon. We wanted to celebrate the success of this amazing tool with a little competition....which turned into a not so little competition.

With a wealth of prizes amounting to a whopping £2000 donated by some amazing companies, which we from Jealous Cow and Be Creative want to say an extra special thank you for supporting us so generously. Visit the website to check out who they are. 

So what was this competition all about - well all you had to do was get your nail art pen and decorate it, in anything you wish.  We wanted to see creativity, we wanted to be wowed and ultimately we wanted to see if we would steal the pen.

The Judges Alisha Rimando, Catherine Wong and myself (Sam Biddle incase you didn't know) represented the international vibe, as this Nail Art pen Competition went around the world and back again.  Uploading images onto Facebook, the entries could accumulate LIKES which played a small and important part in the overall competition, ultimately showcasing the talent out there....and not just on nails.

So enough of the back ground you want to know who won right? Well hold your horses just one second, because a super special mention has to go to everyone who entered, there was a plethora of ideas all lovingly created on the Be Creative Nail Art Pens. Each one a work of art in its self. I want to show case just a few of them, as there was over 50 entries.

Created by Lisa Marie Allen
Created by April Wellington

Created by Aimee Ginsbery

Created by Caroline Carrick

Created by Marlou Dassen
Created by Vicky Louw

Created by Tammi Merritt

This is just a small selection, there was so many favourites of mine, so I have more on the website www.sambiddle.co.uk, and more to come.......there you can look and be inspired. I do hope you upload your design and let up feature it on the Page.

So lets announce the Winner after this long and I am sure you will concur interesting build up :0). 

Congratulations 

to the winner of the 2013 Nail Art Pen competition


1st place Christine Roggeveen

2nd place Szilvia Egerszegi

3rd place Janetta Wouters


Tuesday, 5 March 2013

Independant learning - does not mean buying products.


Q.  Do I need to buy all the be creative products on Sam's class? 
A.  No. 

When I ventured out and became an independent educator nearly 5 years ago now, I wanted to focus on sharing my skills and knowledge through application and not based on products and brands.  I moved away from being a ‘sales’ tech because I was tired of the constant politics and the warped motivation behind teaching. Let me explain…..

I built my business be Inspired on the bases that each and every one of my students can do what I do with what they already have. Over time I started to collect products and develop tools to make my life easier and the job quicker, and of course these where all wanted by my students in the class. “No worries” I would say “I will get you a pack”. 

Eventually I was spending more time on the products and development and not on education where my heart lies, so that is how Jealous Cow Ltd and the Be Creative was born.  Going into partnership with Rebecca, who was already a distributor of her own nail art brand and sub distributor of Ez Flow in the UK.  We developed a business, so I could continue to educate and use what I wanted in the class, and the focus could remain on application and design not products or brands. 

Rebecca then works with all the products and ideas I come up with, we development together as a team and she is the one who distributes them.  It is testament that over the short time Be Creative has been around in the nail world we have grown with little effort, this I feel is down to the way the products are used and relate to existing core products that each of the students use, wether it be Ez flow, IBD, Young nails and ONS.  I have been asked over and again, can I please bring out a core line of gels and acrylics, But both Rebecca and I feel it is important not to confuse our ethos, which is making the nail techs life easier, bringing you things to inspire you and help you develop your own business with what you have already, supported and enhanced by Be creative. We bring you items that others don’t have. I have even suggested we are a boutique brand. 

I don’t care what you use on my class, you can bring your additives and gel paints along, I just want to show you what you can do with them. I am very interested in everyone’s products, like you I am a nail tech through and through, looking at the colours and tools to work with excites me and inspires me. I find something new, I go and buy it right away and use it. I do not judge you or tell you on the class what you can and can’t use, and if your product isn’t quite cutting the mustard, I try and give you an option to make it work for you.  Sometimes this doesn’t even include using anything I have in my own kit.  Let me give you an example, if you need a fast setting powder, so you can hit the mould-able stage quicker and have longer to work with it, but the brand you have in your kit does not allow this, by simply using some acetone on a brush, it does the job perfectly……! 

A good friend of mine a few years ago told me to always remember to do what you do for the good of the Student, not a brand or company. And this has always been my  Ethos.  Some people say that to attend my class you need to buy all my products, I promise you this is not the case. Buying the products is not necessary at all, you will be able to do everything with what you have already. I am very insistent that the class is NOT BRAND RELATED. I am an independent and fought a lot of battles to stay this way, trust me. The brand Be Creative are products that just enhance your own favorite line. 

During the class  it is all there for you to use if you want or you use the products you know and love. The class is about learning new skills and very hands on, to help you move your business forward and help improve the industry as a whole. No one ever should feel you need to purchase anything to work with on the day.

Sunday, 16 September 2012

The Velvet Manicure

With Pink wearing our New Velvet Manicure in her new video, and Rhianna sporting her new Velvet look on Twitter,  Be Creative's Velvet manicure is on a ride of it's life. it seems we just can't pack enough of it. Featuring in popular Magazines such as More, Woman, Cosmoplitan, Company magazine and even in the Sun newspaper...so many more I don't have the space to mention them all... isn't it high time you used this media coverage and sold some Velvet manciures to your clients. 

The Velvet manicure in Lilac


A simple way to cash in on a popular trend is to scour the magazines and beauty blogs for great looks and simple techniques, if they are worn on a celebrity or as an accessory to a fashion trend, then tear it out or print off the page...grab your self some prit stick and stick it on a A4 sheet of paper with the words;
YOU CAN RECEIVE THE VELVET MANICURE HERE
as seen on Rhianna and Pink this month! 


Its as simple as that...turn the media's enthusiam into a marketing tool for your self and give your customers something relatable to talk about. Hay it doesn't matter if your client she doesn't go for the latest look or colour, but you know what,  she knows you know whats hot and on trend, she knows to come to you or recommend you next time.  Most importantly she will be thinking of you the first time someone talks about nails, cause you gave her something to think about. Try it and see what happens.  

To help you in this quest I have a fabulous special offer which you just can't refuse, but hurry we only have 10 sets available. 


Get all 12 colours of the velveteen range currently available
Get 4 of the BRAND NEW velveteen colours - not yet released
Get Free postage
for £50
only availble to the FIRST 10

The new colours are delightful, a dark cherry, reminds me of a rich burgundy and I think this is going to be a very popular colour this winter, for me anyway. Then we have the lilac which I think teamed with some glitter or Swarovski crystals will look really cute to wear for the Christmas parties. The apple green worn with the aqua is quite sumptuous, and together looks very hot.


Another fabulous way to sell your Velvet manicure is to combine it with a gel polish, apply the gel polish as normal and then apply the velveteen with regular topcoat.  This way your clients can enjoy the velveteen manicure for a weekend or evening out, and then remove it when she is ready and still have the beautiful polished fingers until her next appointment. If you want some more great tips on incorporating nail art into your service menu and your heading up to London next weekend, please stop by the Nailympics on Sunday, I will be running a short seminar on this very subject. 

For more information check out this video and the step by step using the new Lilac velveteen. To get your kit you just need to click on this link and hit the buy now button.


Wednesday, 28 December 2011

A Little bit of fun!

My business partner Rebecca and I took a little trip down to Cornwall at the end of the summer, and spent some time with Blue Light Media.  We wanted to created something fun and 'different' to celebrate the launch of our new Brand Original Sugar.  With the Help of my most talented son Jorden who inspired me with this concept of finger tapping to some music, we created this short film. I hope you like it, and I hope you pass it on to your friends and family. 
SUGAR LOVE


The story;  Jamima is a young professional who likes to look good and have a good time.  She gets up as usual with her beautifully manicured nails goes about her day.  As she completes the different tasks her nails start to take shape as if by magic. The design growing and changing before our eyes. This is because Jamima owns a Sugar Styler and whilst she is waiting she is 'sugar coating her nails'  it is as easy as that, by the end of the day she has a brilliantly easy nail art design on her perfect pinkies. 


To find out how you can create the look Jamima has check out this short film too.


http://www.originalsugar.com/